Was this content helpful?
How could we make this article more helpful?
Connect your LaCie 6big/LaCie 12big Thunderbolt 3
The LaCie 6big Thunderbolt 3 and LaCie 12big Thunderbolt 3 are shipped with the following installation components:
- LaCie 6big Thunderbolt 3 / LaCie 12big Thunderbolt 3
- Power cable
- Thunderbolt 3 (USB-C) cable (Thunderbolt logo)
- USB 3.1 (USB-C) cable
- USB 3.1 (USB-C) to USB 3.0/USB 2.0 adapter cable (compatible with Type A ports)
The instructions below are also available on the Quick Install Guide included with the LaCie 6big/LaCie12big.
Windows and Thunderbolt 3
Your LaCie Thunderbolt 3 storage device is certified for use with Windows PCs that have a Thunderbolt 3 port. However, you may experience connectivity issues between the storage device and the Thunderbolt 3 port on a Windows PC. Therefore, before setting up your LaCie Thunderbolt 3 storage device, please visit your PC manufacturer’s website to update your Windows PC to the latest versions of:
- BIOS
- Thunderbolt 3 firmware
- Thunderbolt 3 driver
Also, make certain that your PC has the most recent version of Windows 10.
For questions regarding your PC, please contact the PC manufacturer. You can also review the following website for additional information: https://thunderbolttechnology.net/updates
This issue pertains to the Thunderbolt 3 port and does not affect USB ports.
Step 1 - Download and install LaCie RAID Manager
LaCie RAID Manager is the application that manages the LaCie 6big/LaCie 12big storage. Before connecting the enclosure to your computer, download the installer for LaCie RAID Manager. The installer loads the application and the driver to recognize the Thunderbolt storage.
- Download the installer at LaCie RAID Manager.
- Launch the installer on the computer that will connect to the LaCie 6big/LaCie 12big.
- Follow the on-screen instructions to complete the installation.
Step 2 – Connect LaCie 6big/LaCie 12big to your computer
Thunderbolt 3 connection
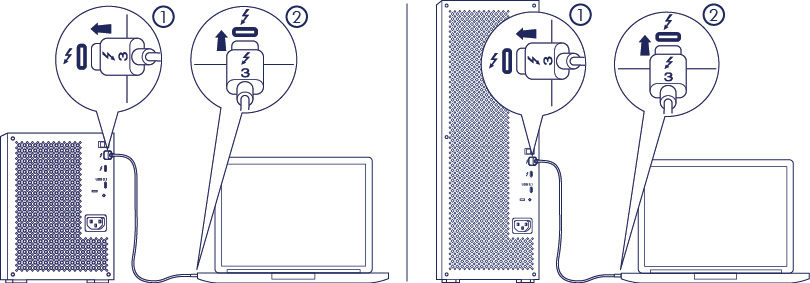
Connect the included Thunderbolt 3 cable to:
- LaCie 6big/12big
- PC or Mac
USB 3.1 Gen 2 connection
PC or Mac with a USB-C port
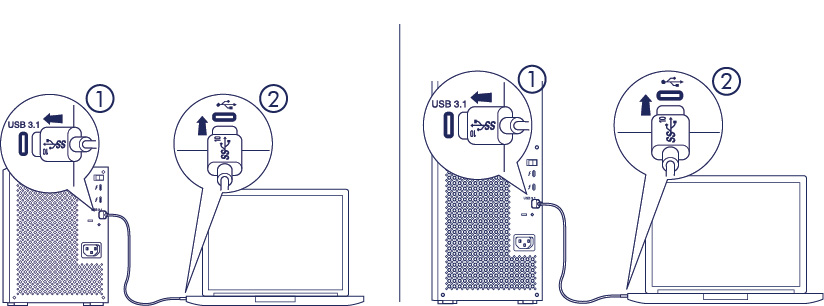
Connect the included USB-C cable to:
- LaCie 6big/LaCie 12big. Make certain to use the correct port with the text USB 3.1.
- PC or Mac. Connect to a USB-C port with the USB 3.1 Gen 1 or USB 3.1 Gen 2 icon.
PC or Mac with a USB 3.0 or USB 2.0 port (Type A)
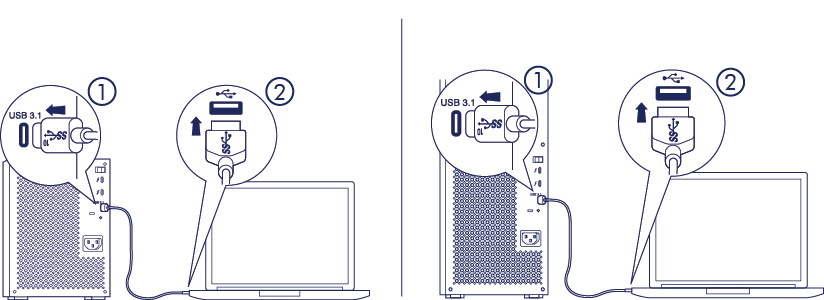
Connect the included USB 3.1 (USB-C) to USB 3.0/USB 2.0 adapter cable (compatible with Type-A ports) to:
- LaCie 6big/LaCie 12big (USB-C end)
- PC or Mac (USB Type-A end)
Step 3 - Power connection
Only use the power cable provided with your device. Attaching third-party or other LaCie power cables can damage your LaCie 6big Thunderbolt 3 or LaCie 12big Thunderbolt 3.
Connect the included power cable in the order listed below.
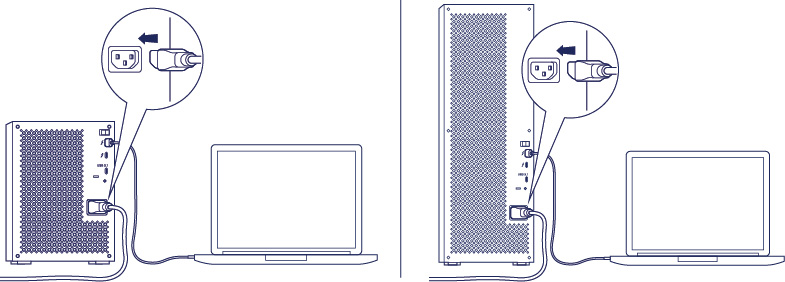
- The LaCie 6big/LaCie 12big power input.
- A live power outlet.
Step 4 - Power switch
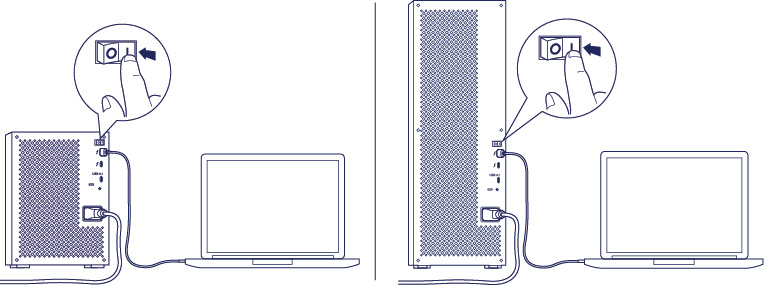
Flip the switch on the back of the device to the “On” position.
Format LaCie 6big/12big storage
Your LaCie 6big/LaCie 12big is shipped as unformatted. When first connecting the device to a computer, you are prompted to format the default RAID 5 array. Before formatting the array, review the chapter on RAID to learn which RAID level is best for your working environment. If you want to change the RAID level or create multiple arrays, see the instructions in the LaCie RAID Manager user manual.
To format the array, follow your operating system’s prompts and use one of the formats listed below.
- Mac: Mac OS Extended (Journaled), also known as HFS+
- Windows: NTFS
For more information about hard drive formats and instructions for each operating system, see Formatting and Partitioning.